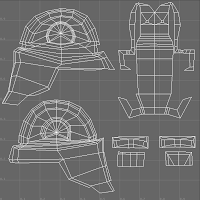
Right, so in turn for him doing my concept art I did some UV mapping for him. Not sure if there's a wrong and right way to do UV mapping but as I talked to my peers, it seems no one likes doing it (except me) and that a lot of people used the auto mapping system. Although it's quick, it does leave your texturing a bit stretched here and there and knowing that I avoided using it and just unfolded everything manually. Don't get me wrong, it seems great for quite complicated pieces but you still need to move some UVs around so I just stuck to what I know best.
Adam's character was some kind of robot space mercenary so his physique was quite blocky. This was good news to me but there were a lot of intricate details in hard to reach places so, I had to do a lot of planar mapping for several parts of the body, mainly the sides of the head. All in all it did take longer than I hoped because after unfolding parts of the body the UVs ended up very messy so I had to do a lot of moving UVs around and essentially problem solving. Where I enjoy it, this UV map was took a while to iron out because there were a lot of edges very close together and they started to overlap one another after unfolding them.
Overall, I believe they were happy with my work and seemed pretty glad they didn't have to do it themselves. I'm just glad I have a skill set which people don't seem to enjoy very much. Means I could be doing a lot of collaborations in the future which suits me just fine.


No comments:
Post a Comment